Instructor Ed Jones has over 30 years of experience in theindustry, has the title of MasterWater Restorer, is an Institute ofInspection Cleaning andRestoration Certification (IICRC)-approved instructor, and hasserved on the S500-2021consensus body committee todevelop the most recent standard.
There have been many articles written about “The Myth of 3 Day Drying” or “The Death of 3 Day Drying.” It is accurate to state that only allowing 3 days to dry structures & contents in residential settings is an unrealistic expectation given all the many variables that need to be considered when drying back to pre-loss moisture content conditions that will inhibit microbial growth from that water loss occurrence. I teach my students to treat every water loss like it was your home. You wouldn’t want any steps skipped or hurried and you certainly want industry standards followed, and everything documented properly to prove you won’t have future issues arising from incomplete drying.
The only caveat I tell them is there is no property insurance, and you are paying for it out of pocket. This makes them consider how to ensure everything was dried properly, but in the most cost-effective manner possible, which unfortunately is many times forgotten or taken advantage of when a water loss is covered by a homeowner’s insurance policy.
The idea of only charging for 3 days of drying every time in a residential setting was created years ago by a franchisor who was competing for recognition in the drying marketplace and guaranteed 3 days of drying on all water losses. *They did publish a disclaimer that allowed for special circumstances when the guarantee would not be valid
With today’s drying technology it is possible to dry many materials in 3 days, especially porous materials like carpet, carpet cushion or pad, and drywall, at least when the water loss is not contaminated and there is a quick response by a professional restorer. I am very fortunate that I get to “flood” a real home built according to local building codes, but built on a college campus for testing, every month intentionally. We “flood” the house just to see what materials can be dried on a category 1 water loss and how long it would typically take to dry specific materials when the materials have been wet about 24-36 hours before mitigation begins.
After flooding materials in an IICRC approved Applied Structural Drying (ASD) flood house over 135 times I have discovered that the secret to keeping drying times short in most situations is the utilization of science, like increased vapor pressure differentials, and paying attention to the details. I like to tell my students, “Attention to Detail and Performing the Little Things Extremely Well are the Stepping-Stones to Great Accomplishments.” Every month we dry most of the wet materials in a normal category 1 residential water loss in 3-4 days, but don’t get the engineered wood or hardwood flooring dry until day 5. And this is in a home that is furnished, but doesn’t have anyone living there, so we have more flexibility on using heat to speed up the drying.
Below are the 6 ways to dramatically improve drying effectiveness and keep drying times short while drying as many materials in place as possible:
Meticulous Extraction – slow down so carpet will dry within 24 hours and carpet pad, if saving, will dry within 48 hours. Take multiple passes with the specialty extraction tool and use the slowest setting when saving carpet pad. Too many times, technicians are in a hurry, and too much time is spent evaporating and dehumidifying water that could have been removed physically.
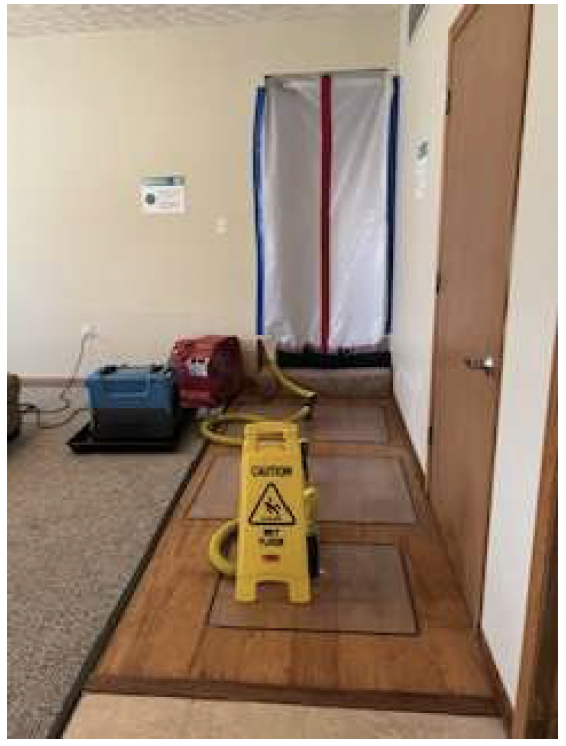
Containment – set better containment to focus the hottest, driest air on the wettest materials and to protect the unaffected areas from the affected areas. Place warning signs to keep everyone out of the affected areas and explain why the affected areas MUST be separated from the unaffected and drying equipment left undisturbed. Good containment allows the restorer to better utilize energy in the form of heat to speed up the drying process, while at the same time protecting occupants. Focus the drying on the smallest area possible!
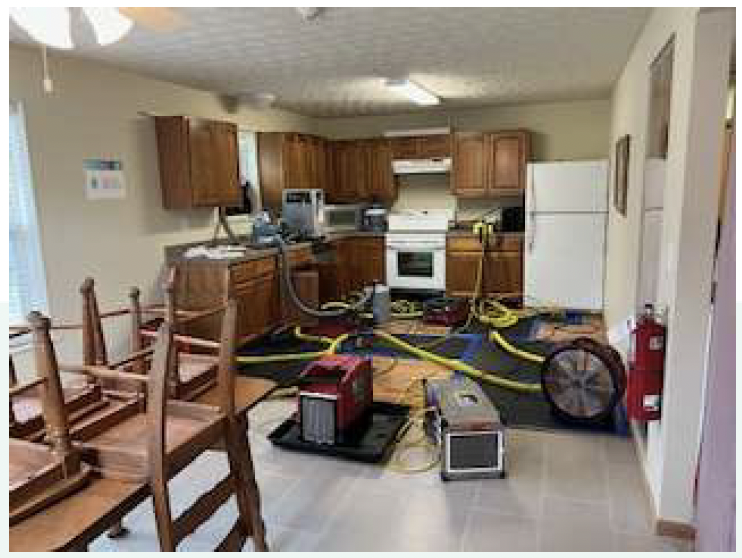
Air Movement & Dehumidification – use of high velocity air movers to speed up the evaporation process for it is important to ensure continuous airflow across all wet surfaces and moving theair movers DAILY to ensure best airflow across the wettest materials. Too many times, air movers are allowed to sit in the same place for days, thus extending drying times. Also, place enough effective dehumidification (Low Grain Refrigerant dehumidifiers in residential) to handle the amount of water vapor you are putting into the ambient air in your drying chambers.
Temperature Control – use containment and the heat being generated from dehumidifiers and airmovers to raise ambient air temperatures (just in drying chambers) while focusing the hottest, driest air on the wettest materials. In some challenging drying situations, it may be necessary to add safe portable heat under containment to achieve good vapor pressure differentials. Take wet surface temperature readings daily and track your vapor pressure differentials to gage how quickly the materials will dry. It is your responsibility to dry as much as possible as quickly as possible right where it is!
DAILY monitoring – checking and moving the drying equipment every 24 hours is critical, as is recording of psychrometric and moisture content readings, including wet surface temperature readings to figure vapor pressure differentials. Increasing vapor pressure differentials in the drying chambers is the best way, along with better physical extraction and evaporation, to shorten drying times.
Better documentation – of the drying process to better identify daily what is drying and what isn’t, so steps can be taken immediately to adjust the drying equipment to speed up the drying process. You must be able to articulate your drying plan and explain why something isn’t drying properly to justify extended drying. Also, it is critical that the mitigation process is well-documented and proves all materials were dried to acceptable moisture levels and occupants were kept safe. Too many times, daily inspections are skipped or missed, thus extending drying times. Provide photos of final moisture content readings of each affected material you are drying labelled where located!
So, in summary, although there are many porous materials that can be dried in 3 days, 3 days of drying should never be mandated for there are too many variables and we need to stay open minded to any challenges the restorer faces.
By the same token, it is the restorer’s responsibility to use science and technology to dry as quickly as possible, while following the 6 effective ways listed above to speed up and record your drying. Remember, treat every water loss like it was your home by drying as many materials as quickly as possible while documenting the mitigation process to prove you left all affected materials in pre-loss conditions that will inhibit the growth of mold.
Contractor Newsletter
Sign up today to receive quarterly tips on best practices in home repair, growing your contracting business, and more.