Instructor Ed Jones has over 30 years of experience in theindustry, has the title of MasterWater Restorer, is an Institute ofInspection Cleaning andRestoration Certification (IICRC)-approved instructor, and hasserved on the S500-2021consensus body committee todevelop the most recent standard.
First, the ANSI/IICRC S500-2021 states that “If Category 2 or 3 water has collected in interstitial spaces under the floor, finish flooring should be removed, and the subfloor evaluated for damage.” So, to save engineered wood flooring we need to get to the loss quickly while it is still category 1.
Questions to ask the technician when evaluating to try to restore an engineered wood floor or remove and replace it:
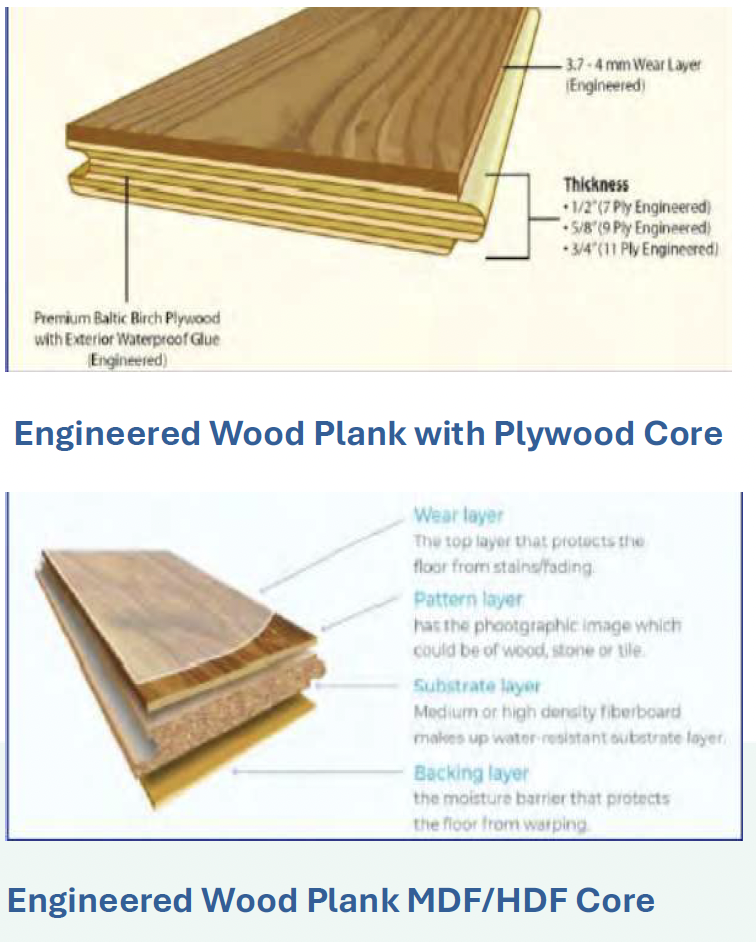
Confirm type of wood floor for many times engineered wood planks can look a lot like real wood and are misdiagnosed. Ask for a photo of a side view of an affected plank to determine engineered wood and what type of core (plywood, MDF, or HDF). If MDF or HDF core, our success rate for drying diminishes dramatically. *See photos next column
Also, you can ask the insured what type of floor it is and see if they have any extra planks? We need to dig deeper at the very beginning of our discussion about potentially drying the engineered wood flooring to correctly identify what type it is. If no extra planks to examine then go to a floor vent or edge of floor and remove vent cover, base trim or threshold, if needed, to obtain a side view of an affected plank. Obtain good photos of overview of affected planks, as well as close-ups and side views.
Type of subfloor?
Plywood?
OSB?
Wood planks?
Concrete slab? This is the most difficult; check for a vapor barrier, and if trying to save, be sure to take plenty of time extracting with a strong extraction unit before placing floor panels.
Type of Installation?
Glued?
Nailed?
Free-floating)? If free-floating, be careful as many times there is a vapor barrier underneath, and if water penetrates under the vapor barrier, we will have to remove, if we can’t dry the subfloor from below.
Planks coming loose from subfloor?
Many times, if engineered wood is glued straight to the subfloor, we need to check to see if adhesive is coming loose. If glued the planks won’t cup much but will start pulling loose from substrate if left wet very long. Ask for photos showing planks separating from substrate to validate removal.
Condition of engineered wood planks?
Check the edges where the planks meet the wall or other planks to see if edges are cracking, splitting, or “crinkling” as that is an indication of water damage that cannot be reversed.
If engineered wood planks are in good condition, not coming loose, and we feel it might be possible to dry it, be sure to instruct the technician to be meticulous with their extraction process, especially if installed over a concrete slab. This will take a strong extraction unit running through a clear wood floor mat, so it is possible to see moisture coming up from the cracks. This could take several minutes per mat section. Be patient and keep extracting until no more moisture observed. Reexamine the planks carefully to make sure they are still in good condition and not coming loose. Take photos of the condition after the extraction process before placing wood floor drying mats.
Type of drying system?
If you think the engineered wood floor may be salvable, then important we identify if the technician has the proper equipment and knowledge to save it.
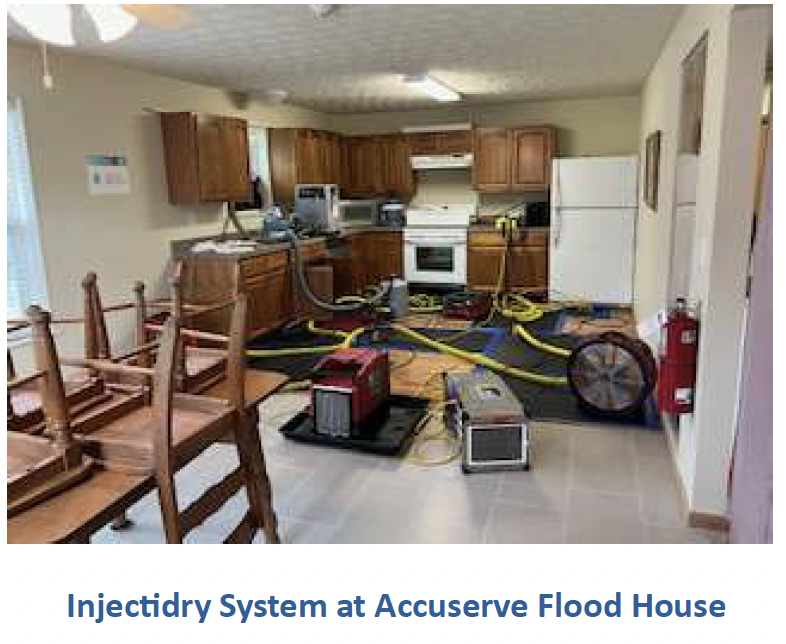
Injectidry HP Plus—can dry more than 400 square feet of wood flooring with one system. Great suction!
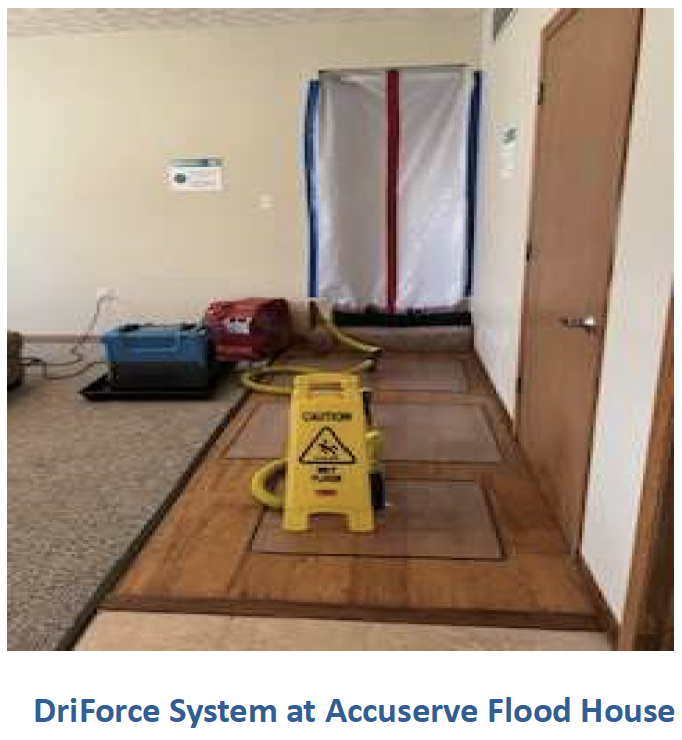
DriForce - with Rescue Mats will only work when only using three or four mats maximum as it is not as powerful as the Injectidry system. It works, just on smaller areas.
Tips for Drying Engineered Wood
Wood floor drying system setup –Place wood mats butted up to one another perpendicular to the grain of the wood, so no planks are skipped. You can typically space out the lines of mats by three to five feet between them. Tape all the edges of the mats to ensure a good vacuum seal. You will need good photos of the equipment setup to validate.
Utilization of tent - Tent over wood floor mats with 6 ml plastic weighted down around edges with sandbags (don’t use tape, if possible). Leave one corner open for air to exhaust back to the dehumidifier. Use lay flat ducting from your dehumidifier exhaust to direct the hottest, driest air possible onto the surface of the wet wood floor.
Wet surface temperature readings -You want the wet surface temperature up to 100 to 105 degrees F. Keep the ambient air in the drying chamber temperature no more than 100 degrees F, but it’s OK for the air under the tent, if you are tenting the floor, to be above 100 degrees F. You must be able to provide gpp of air under tent and wet surface temperature of the wood floor to be able to figure vapor pressure differential or use Reets Evaporation Potential Chart to figure evaporation potential. You want to be in the green or the yellow to show the heat is helping. *See EP Chart next page
Check at 48-hour juncture of drying -Typically, it takes at least 48 hours of drying to see much of a visible difference in cupping. Remove the mat closest to dehumidifier exhaust or portable heater, and check underneath (take a photo of cupping to compare to initial photo). Moisture content should be reducing each day with the goal to be under 17% moisture content. You may need to move the mats around every 24 hours, after the first 48 hours, to focus the drying on wood planks that are cupped the most. Make sure to reseal the edges of the mats!
Allow for acclimation time - Don’t promise the wood planks will be flat when planks have reached their drying goal as it will take 30 to 60 days for the wood planks to acclimate and finish flattening out, depending on local humidity levels. Goal is to reach dry targets; NOT get the planks completely flat. Clean the wood floor surface with manufacturer approved cleaner to remove any sticky substances that might have come through the cracks of the planks.
Take final photos showing the wood floor was saved, including final photos of readings - Take moisture content readings with non-penetrating moisture meter on surface of wood planks and penetrating moisture meter on edges or in between cracks. You may have to take wood subfloor readings from below. If engineered wood floor is installed over a basement, crawlspace, or main level you should dry from below with hot, dry airflow ducted into ceiling cavities.
Remember to document each step with photos to validate length of drying time, including photos of daily moisture content readings and IR thermometer readings of wet surface of planks. You will be surprised how often you can save a good, engineered wood floor with meticulous extraction and proper drying techniques.
Contractor Newsletter
Sign up today to receive quarterly tips on best practices in home repair, growing your contracting business, and more.