Instructor Ed Jones has over 30 years of experience in theindustry, has the title of MasterWater Restorer, is an Institute ofInspection Cleaning andRestoration Certification (IICRC)-approved instructor, and hasserved on the S500-2021consensus body committee todevelop the most recent standard.
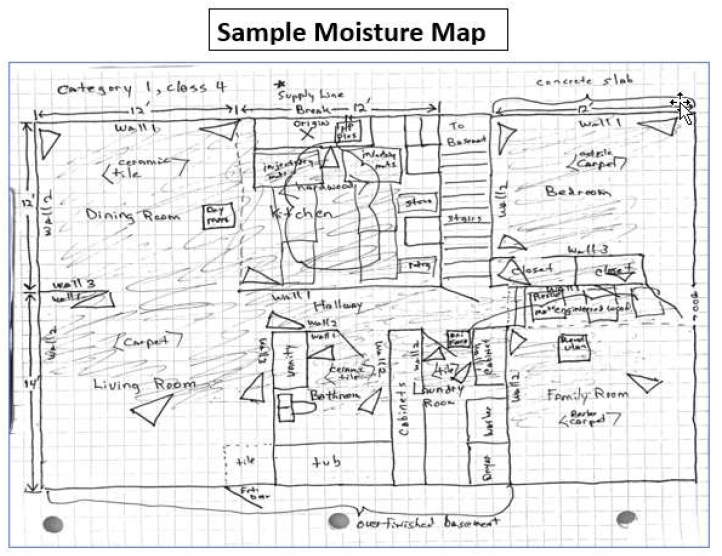
The ANSI/IICRC S500-2021 Standard for Professional Water Damage Restoration states that a drying chamber is a drying environment that uses existing or temporary barriers to contain an affected area to enhance and accelerate the reduction of moisture content in affected materials. Category and Class of water could be different in each drying chamber.
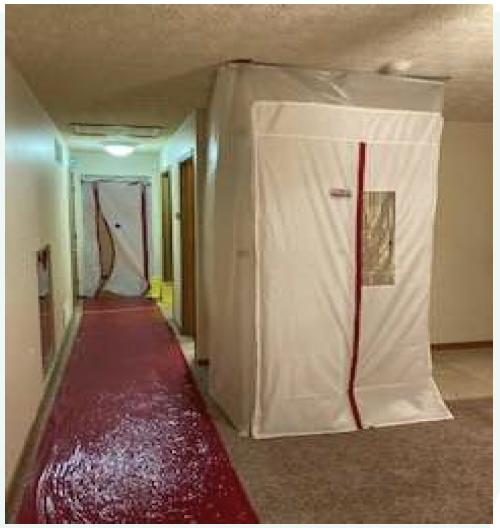
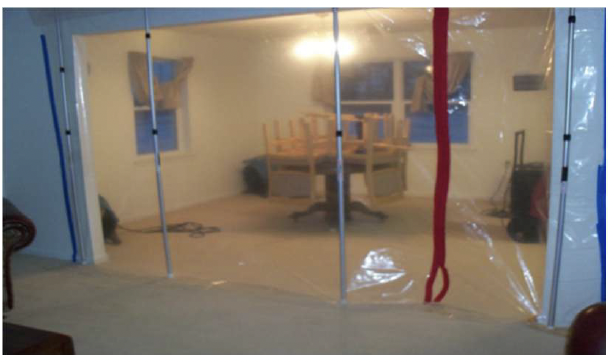
Not only does the drying chamber focus the drying on the smallest area possible to speed up the drying process but also separates the affected areas from the unaffected by keeping humidity, temperature, noise, and potential contaminants from spreading to unaffected areas. There should be drying chambers placed on every drying project. Sometimes you can create a drying chamber by just closing a door, but it is critical that drying chambers are used, and photos of all your drying chambers should be provided and shown on your sketch/moisture map.
Drying chambers typically are multiple rooms that are sharing the same air, so as long as you have an open doorway or walls removed and you are sharing air with another affected room it is one drying chamber. There should NOT be a drying chamber created for each affected room as long as the water damage is contiguous and air can be shared. Humidity and temperature will seek equilibrium with its environment, so you don’t need a dehumidifier in every room!
Most drying chambers are by level of the structure, e.g., first floor, second floor, basement, crawlspace, attic, garage, etc. An exception would be that there is a significant amount of dry area between two wet areas and for ingress/egress reasons it makes sense to have separate drying chambers on the same level.
Remember, we place air movers by affected room, but dehumidifiers and air filtration devices (AFDs) by drying chamber. You determine the class of water by drying chamber at the time drying is initiated, which is typically after demolition and cleaning has occurred, so keep that in mind. The class of water has a direct correlation on how much dehumidification is required initially in each drying chamber so you need to evaluate how much wet carpet, and drywall in each drying chamber needs to be dried (SF of surface area in the chamber) vs. removed and replaced for that will help in identifying the proper class of water.
Always take photos of your initial equipment setup in each drying chamber and show how you separated the affected from the unaffected areas. If it is a contaminated water loss it is critical to not only show a tight drying chamber, but that it is under negative air pressure with the exhaust of the AFD blowing out of the chamber to help remove contaminants. Anytime you have a category 3 water loss or there could be potentially disturbed mold, asbestos containing materials or lead paint, you should have good photos proving you protected the indoor air quality and did NOT place air movement that could spread contaminants. Also, be aware of all HVAC supply and return vents are located so you don't accidentally spread contaminants through the ductwork.
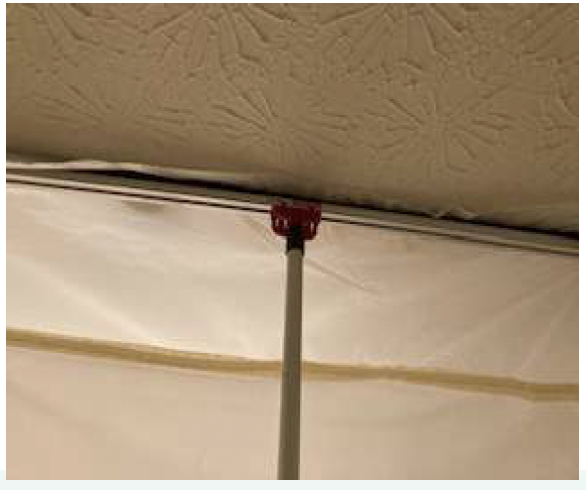
Finally, be careful when using tape to hold your containment to walls, floors, and ceilings for it can pull off finishes depending on type of finish, temperature, humidity, and length of time tape was left in place. Are you aware that there can be an 8–14-day warranty on even painter's tape, regarding potentially removing finishes when removed? Always test surfaces first and don't leave tape in place for an extended period of time. It is now possible to build containment without using tape by using foam bars under pressure to create a tight seal against walls and ceilings.
Contractor Newsletter
Sign up today to receive quarterly tips on best practices in home repair, growing your contracting business, and more.